The fine art of visible mending and embroidery

The days of constantly buying new are coming to an end. In the last 15 years, clothing production has roughly doubled. It is estimated that the average garment is worn only ten times before disposal. Less than 1% of all materials in clothes are recycled into new garments.Enter the glorious art of mending - and not just mending. Visible mending - where each stitch is a glorious sign of who you are and what you love and where your clothes have been.
We asked blogger Constance Eyre @savingthreads for her favourite techniques.
By Constance Eyre
@savingthreads
I have been sewing all my life. To clarify, I have been sewing “a bit” all my life. I learned to sew at a young age, or at least use a needle and thread because I liked to repurpose my elder sisters’ clothing, usually without prior consent. The first was a pair of yellow tracksuit bottoms. One leg became a ra-ra skirt. I loved it. My sister was less impressed. I was 5.
I chopped old Scottish kilts into 90s grunge mini skirts (again, this was less than popular as it turns out kilts can be very, very old) and cut necks out of T shirts and jumpers. I mastered a sewing machine by around 14 and could make up basic patterns. I’ve always loved making something new out of something old but other, adult things took over and I found I had less and less time to sew or be as creative as I had been in my youth.
Along with thousands of others, 2018 was the year my eyes were opened to to the plight our planet due to our extreme clothing consumption and our ‘throw away’ culture. The piles of clothes discarded into landfill, or incinerated were so far removed from the behaviour of most people, just two generations ago, when it was considered a bit frivolous to have more than one ‘formal’ dress, or winter coat. Not to mention more than one pair of ‘party’ shoes.
I have a young daughter and I decided that I was going to take a step away from our fast fashion culture, and find a way back to a more mindful approach to clothing. In the past few months, I’ve hand knitted my first sweater, of which I’m very proud. But more importantly, I’ve been researching and learning some really wonderful mending techniques, some I’d seen my mother and grandmother use and some completely new to me.
Visible mending is something I have become passionate about. Something you’ve worn for years becomes something new overnight and carries a piece of you with it. It becomes unique. It is the antithesis of fast fashion and, to me, it's become a form of self expression. Some of the techniques are really simple, if you have basics of sewing skills. Some take a little practise.
Here is my list of the techniques I’ve found to be manageable with these small skills, some time and a bit of ambition.”
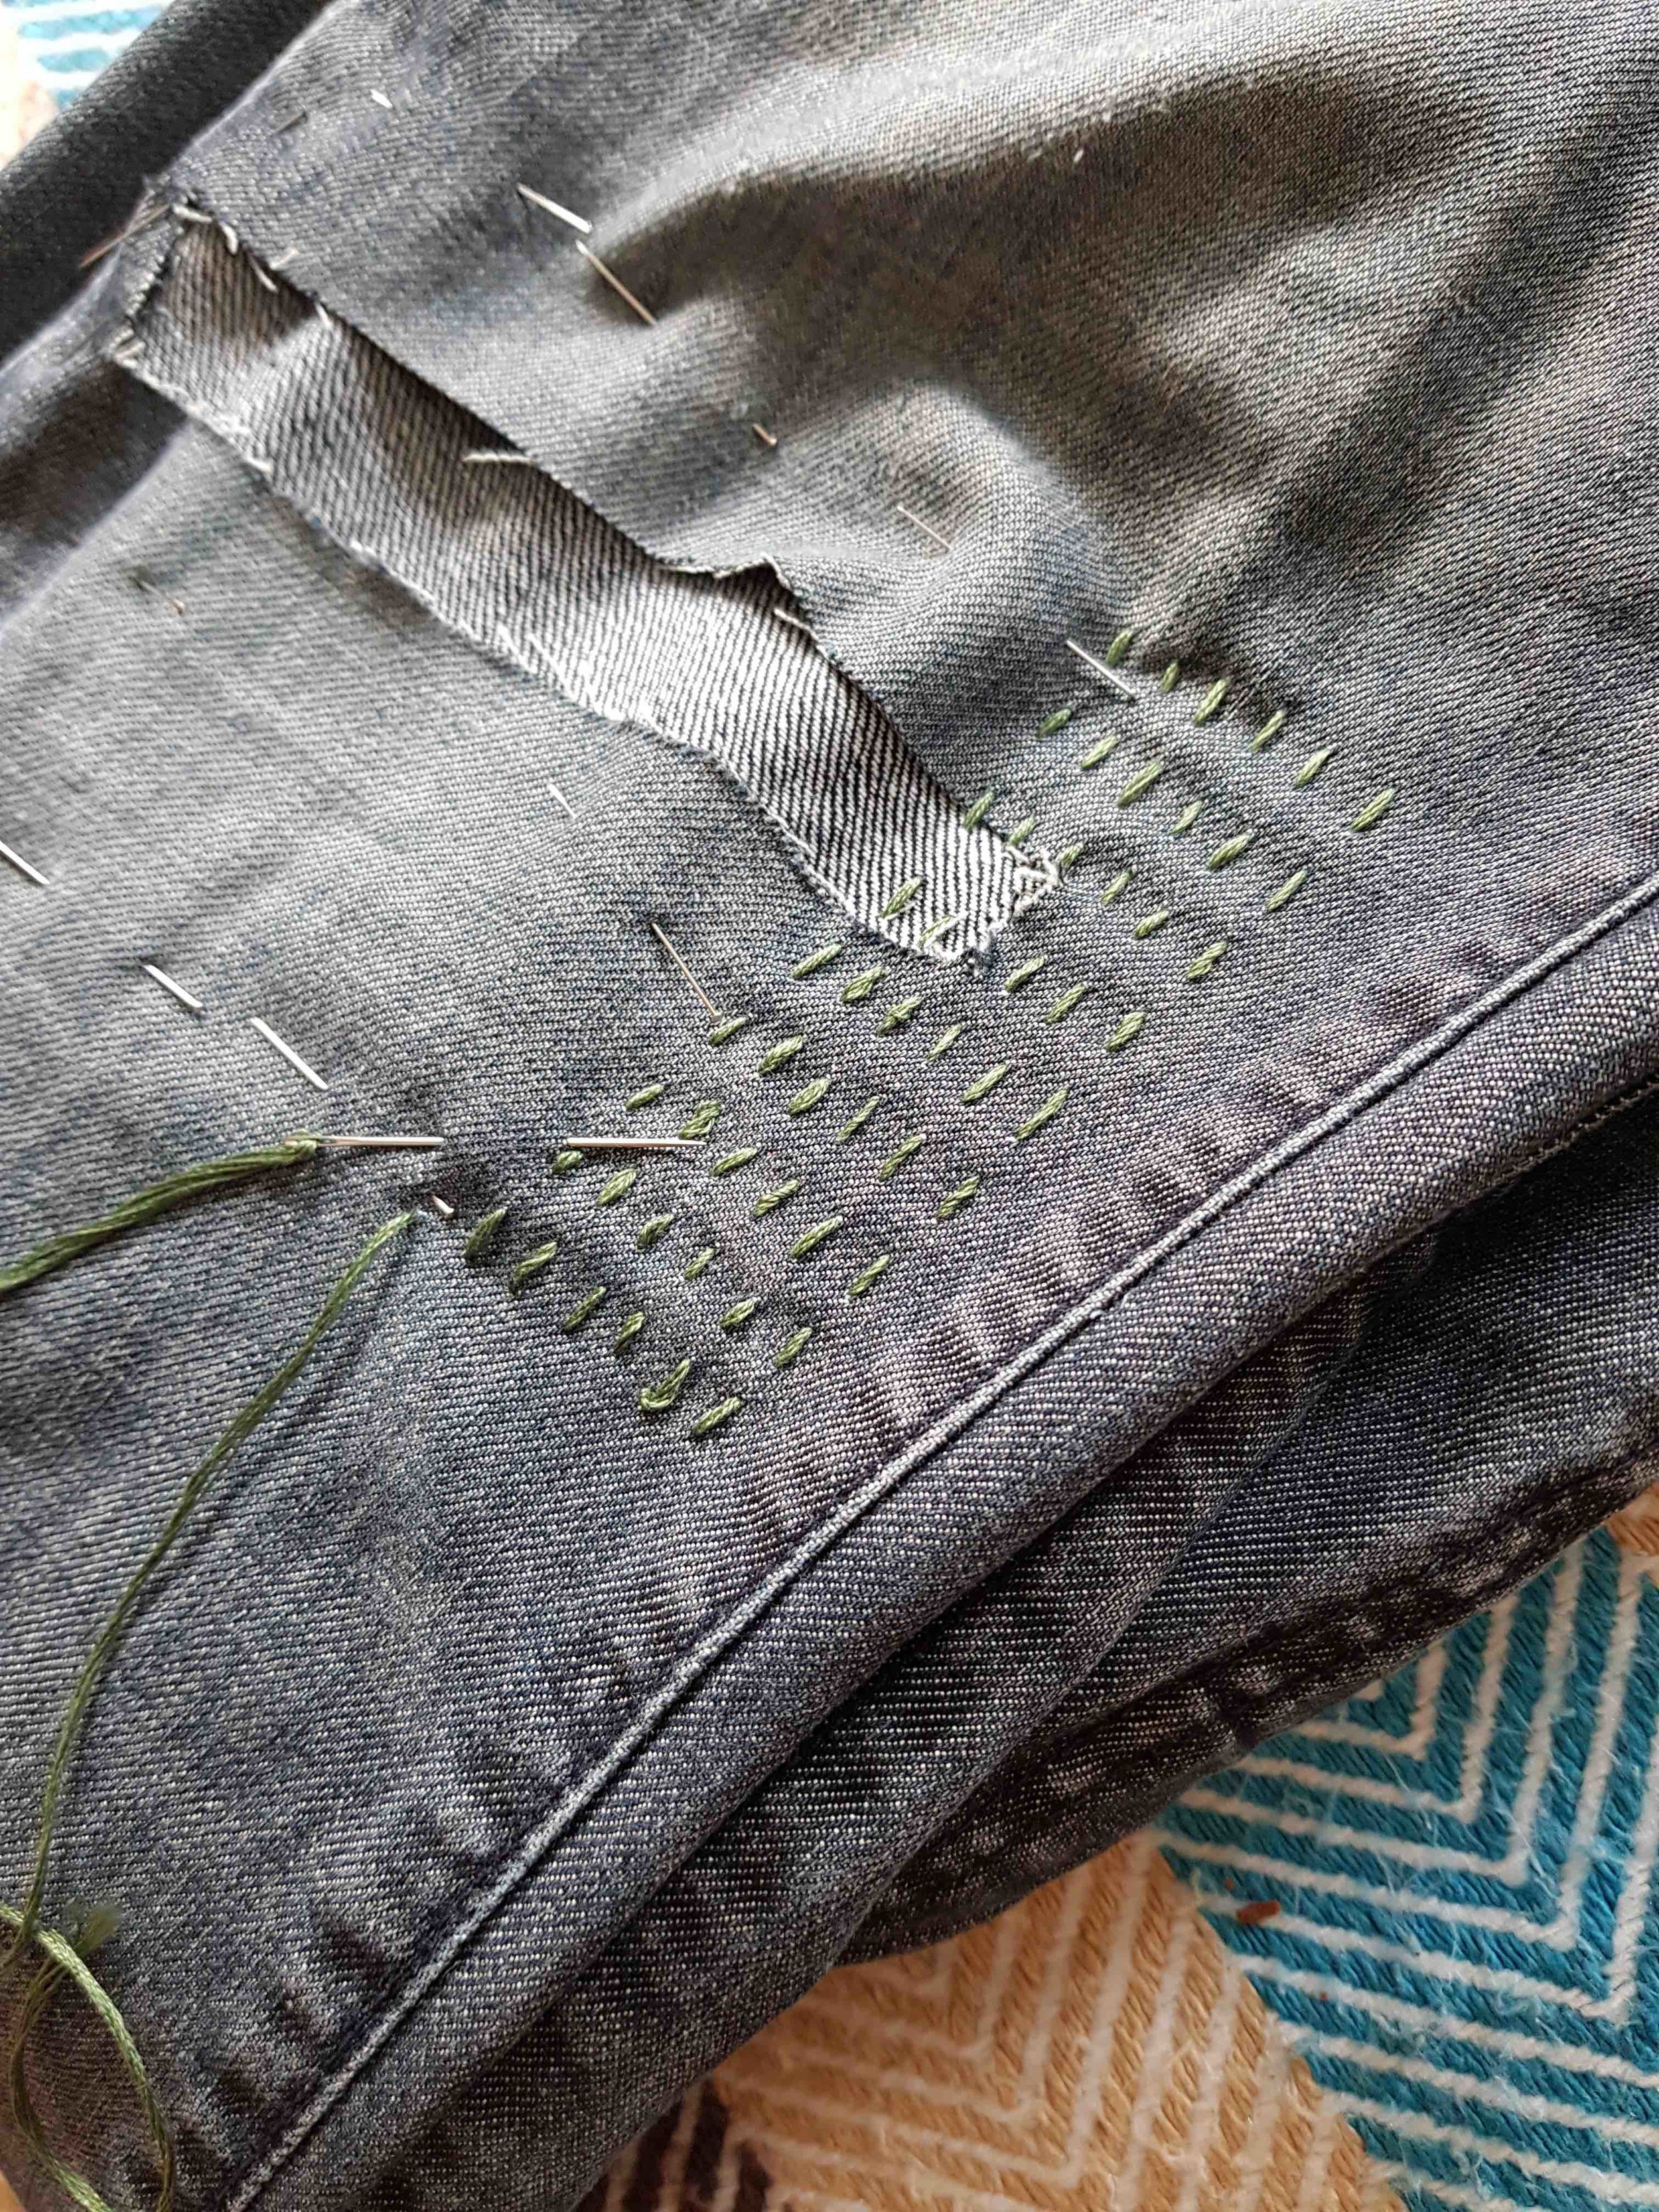
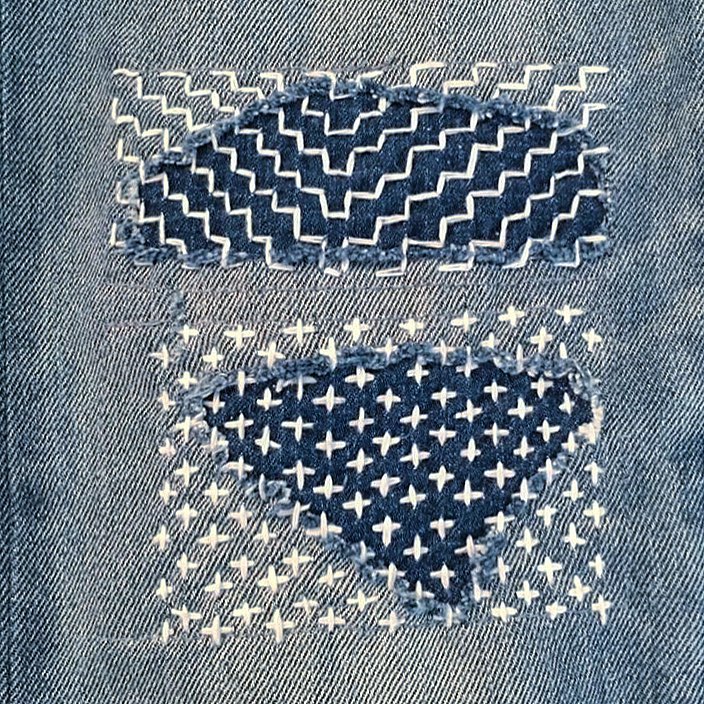
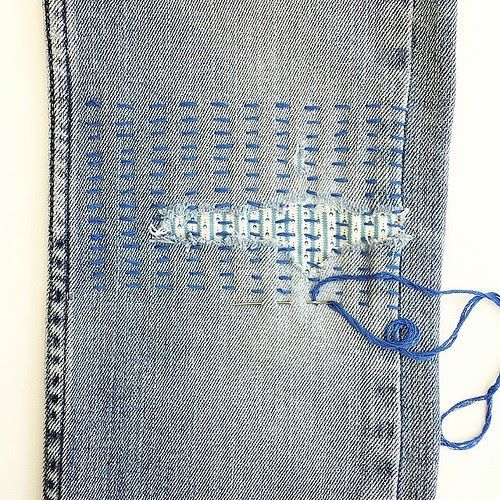
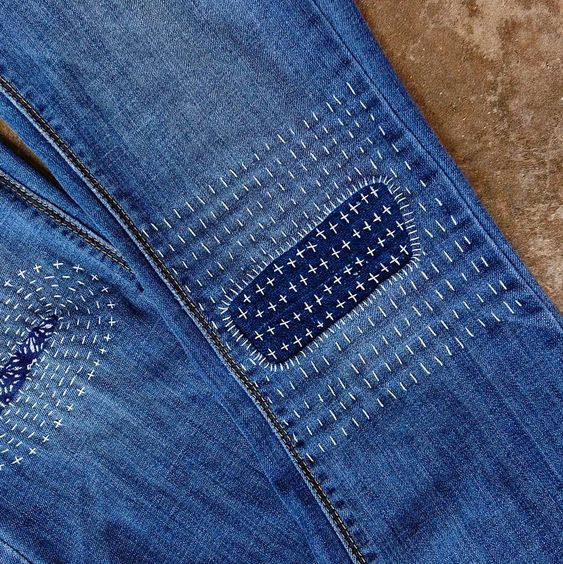
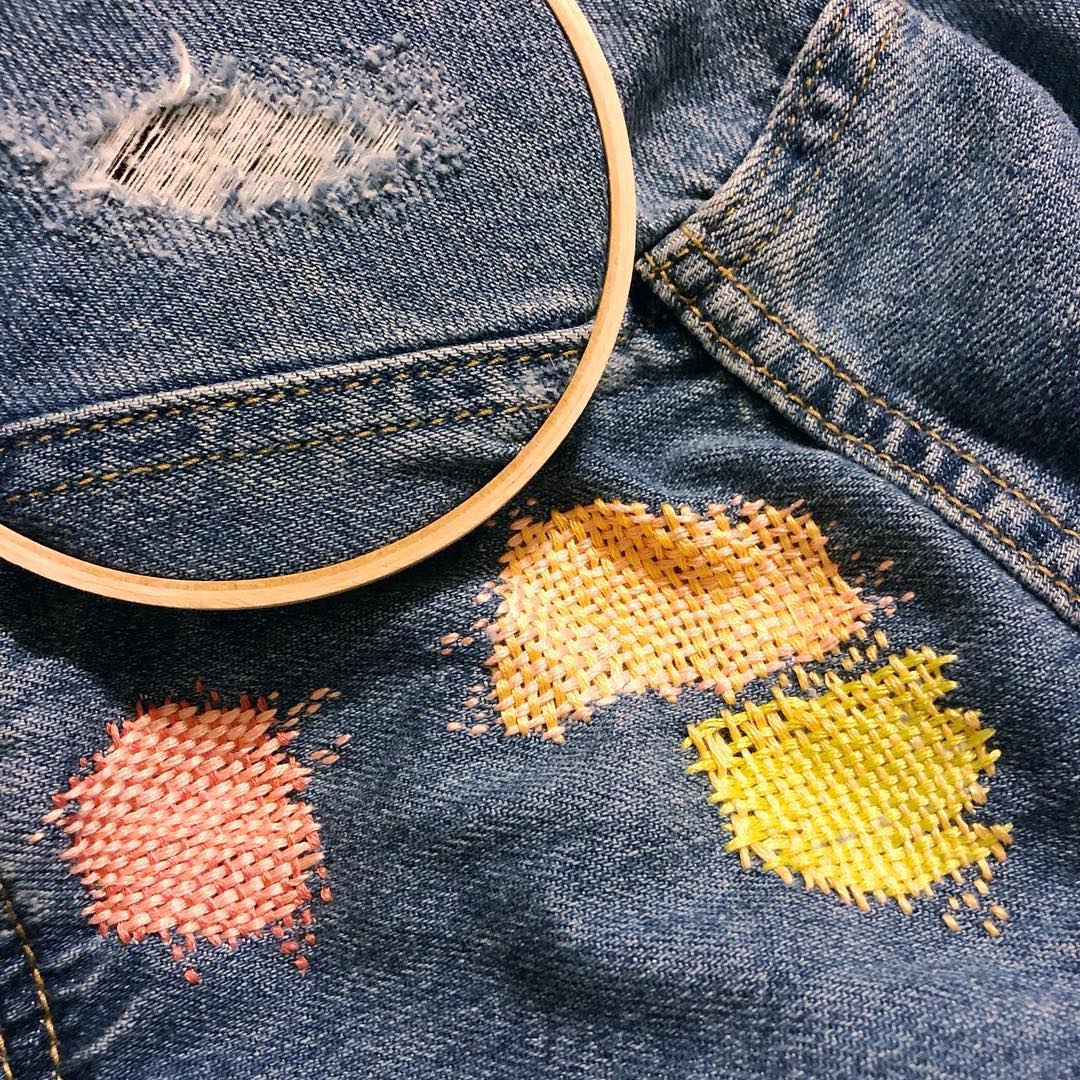
1. Boro or Sashiko Darning
This is very easy in its most simple form. If you have a rip or hole in your jeans, this is the technique for you. Cut a piece of denim or fabric at least an inch bigger than the hole in all directions and pin it behind the hole inside your trousers. Using a fabric pen or pencil draw horizontal lines across patched area around 0.5 cm apart. Using some embroidery thread, do a running stitch along the lines backwards and forwards until the whole patch is secure. If you are feeling brave, you could continue to sew a running stitch vertically up and down the patch, and make small crosses as a feature as well. In fact there are all sorts of patterns that can be done in this technique once you are feeling a bit more adventurous and all use a basic running stitch.


2. Iron-on patch and Blanket stitch
You can buy iron-on fabric patches in most sewing shops. Once you’ve ironed the patch onto the top of your hole or rip and its stuck and secure, choose your thread colour. Tie a knot in your thread and, starting from the inside, sew through the patch and jeans and work around it in a blanket stitch. This is made by sewing a loop and passing the needle about 0.5cm away from your first stitch. Then pass the needle through the loop and pull tight. Once you make it all the way around, finish your last stitch with the needle on the inside of your jeans and secure through a few loops at the back.
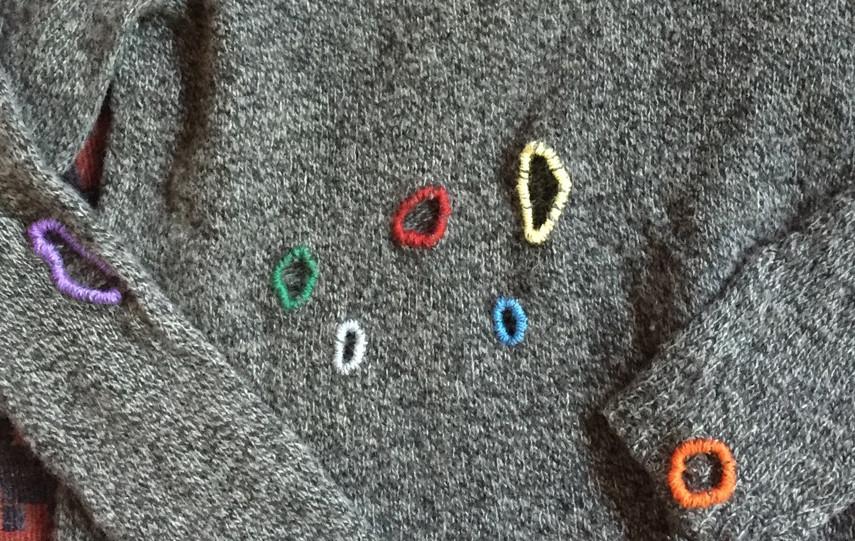
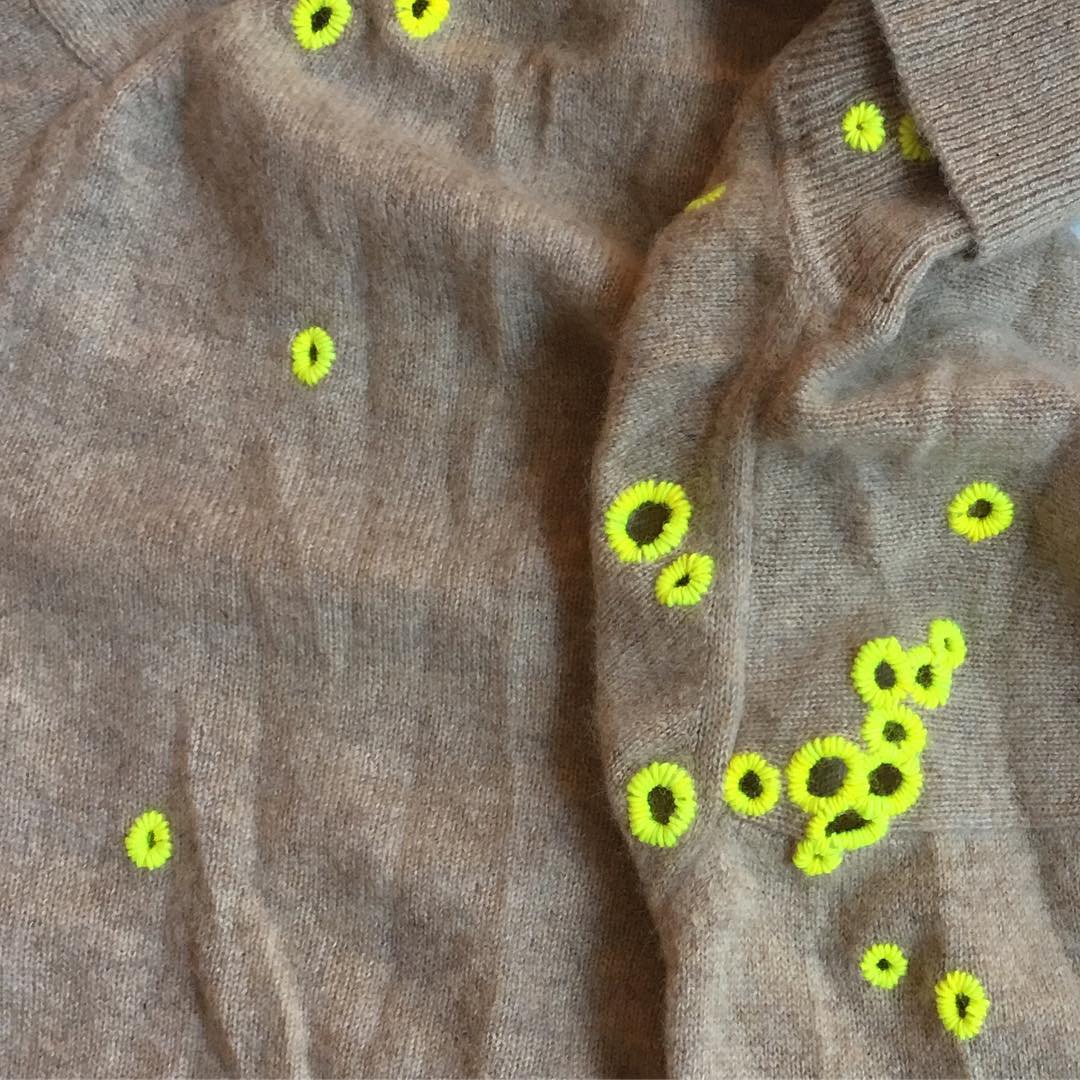
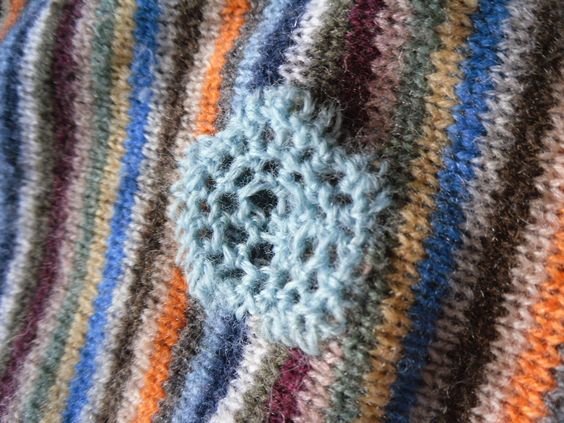
3. Portholes with an Eyelet stitch
This visible mend technique is perfect for small moth holes in jumpers or T shirts. This is where you simply outline the holes in a neat eyelet stitch. If possible, draw a circle in pencil around the hole around 0.5 - 1 cm away from the hole. This will be your stitch guide (although it won’t be so easy with a knitted garment, you’d have to trust your eye.) The area between the drawn line and the hole will be filled with stitches. Secure the end of the thread, and pass the needle in through the hole and then up through the fabric on the stitch line. Repeat this as near as possible to the previous stitch and continue around the hole. To make the hole bigger, and more of a ‘feature’ just pull the thread tighter.

4. Crochet mend
Crochet is basically a way of making a continuing chain out of yarn (single crochet) with a hooked needle and once you can do that, you can create all sorts of wonderful lace like patterns. If you have a larger hole in a knitted garment, crochet it a good way of mending as you can secure the hole with one circuit of single crochet, or a chain that weaves in and out of the garment which would pick up any stitches that are running, and stop it from getting any larger. Once you had completed this, you can continue your chain round in a spiral, filling it up the hole with rounds of single crochet until you reach the centre.
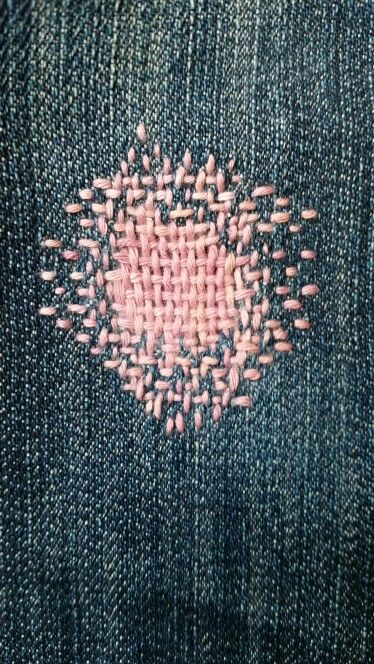
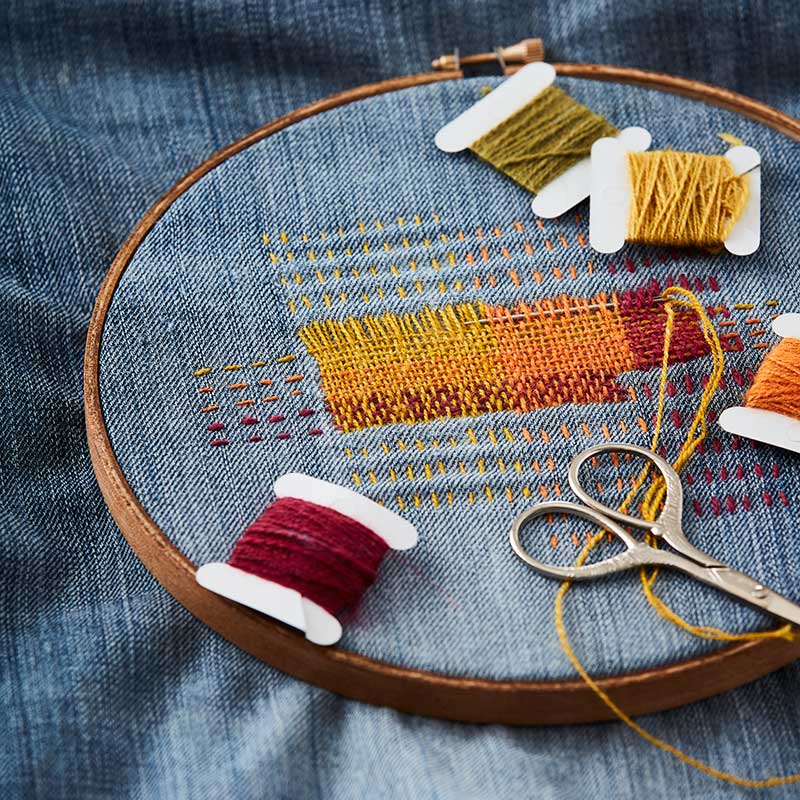
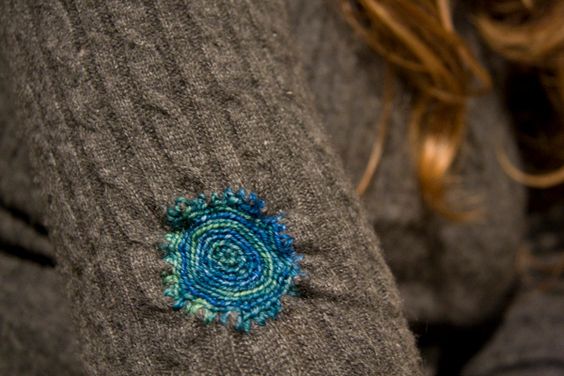
5. Darning or Needleweaving
This technique is traditionally used for mending knitted garments like socks but can be used just as successfully on woven fabrics like denim. It looks complicated but it is really quite simple. Using a thread of a similar material to the garment that needs mending, begin 1cm to the right and 1cm underneath the hole. Sew small stitches, in a straight line upwards until you reach 1cm above the hole. Then do the same thing going downwards, next to your first row with almost no gap. Continue to create rows of stitches in this way up and down. When you get to the hole itself, simply let the loose thread cover the hole, trying to apply a similar tension to the rest of the material. Once you have sewn rows of thread across the hole, continue to create a few more, until you have reached 1cm to the right of the hole. This will ensure a strong mend. This is called a ‘warp’ (the vertical threads). To complete the darn, you will now need to weave the ‘weft’ (horizontal threads). From the top right-hand corner, begin making small stitches horizontally across the darning area. When you come to the end, reverse your direction, as before. However, this time, when you reach the hole in the middle, direct the needle over, then under each of the warp threads. The next time you cross the hole coming from the other direction, weave the needle in and out the opposite way to the last row. The rows should alternate between going over and under the warp - but don’t worry if it’s not exact. Continue sewing your horizontal rows until you reach the bottom of the darning area. I like to do this in contrasting colours as it can can look really beautiful.
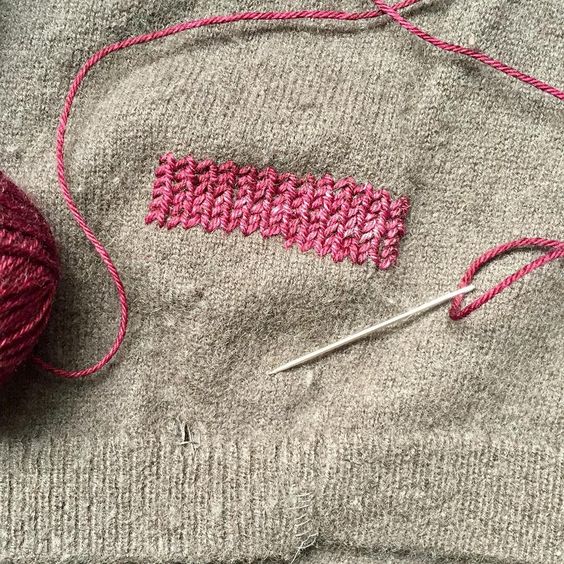
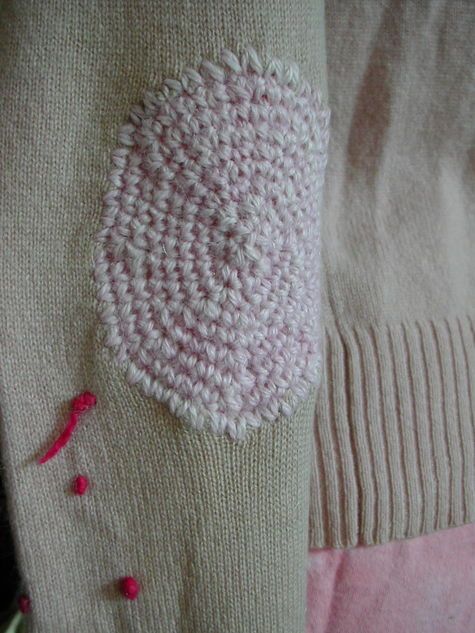
6. Swiss darning (Duplicate stitch)
This is a little bit more advanced that needle weaving as it follows the types of stitches used in knitted garments to to make what can be an invisible repair. It's better to do this when the garment has worn thin, rather than made a hole, as the stitches are much easier to follow. Chose a yarn that is the same weight as the garment. Using a tapestry needle, bring the needle from back to front at base of the V of the knitted stitch to be covered. Insert yarn needle from right to left under both hops of the stitch in the row above. Insert tapestry needle through the base of the V again and bring it through the base of the V of the next stitch to be covered. Once you have done this a few times, you will see that you are in fact replicating the original knit stitch and covering the original knitting.
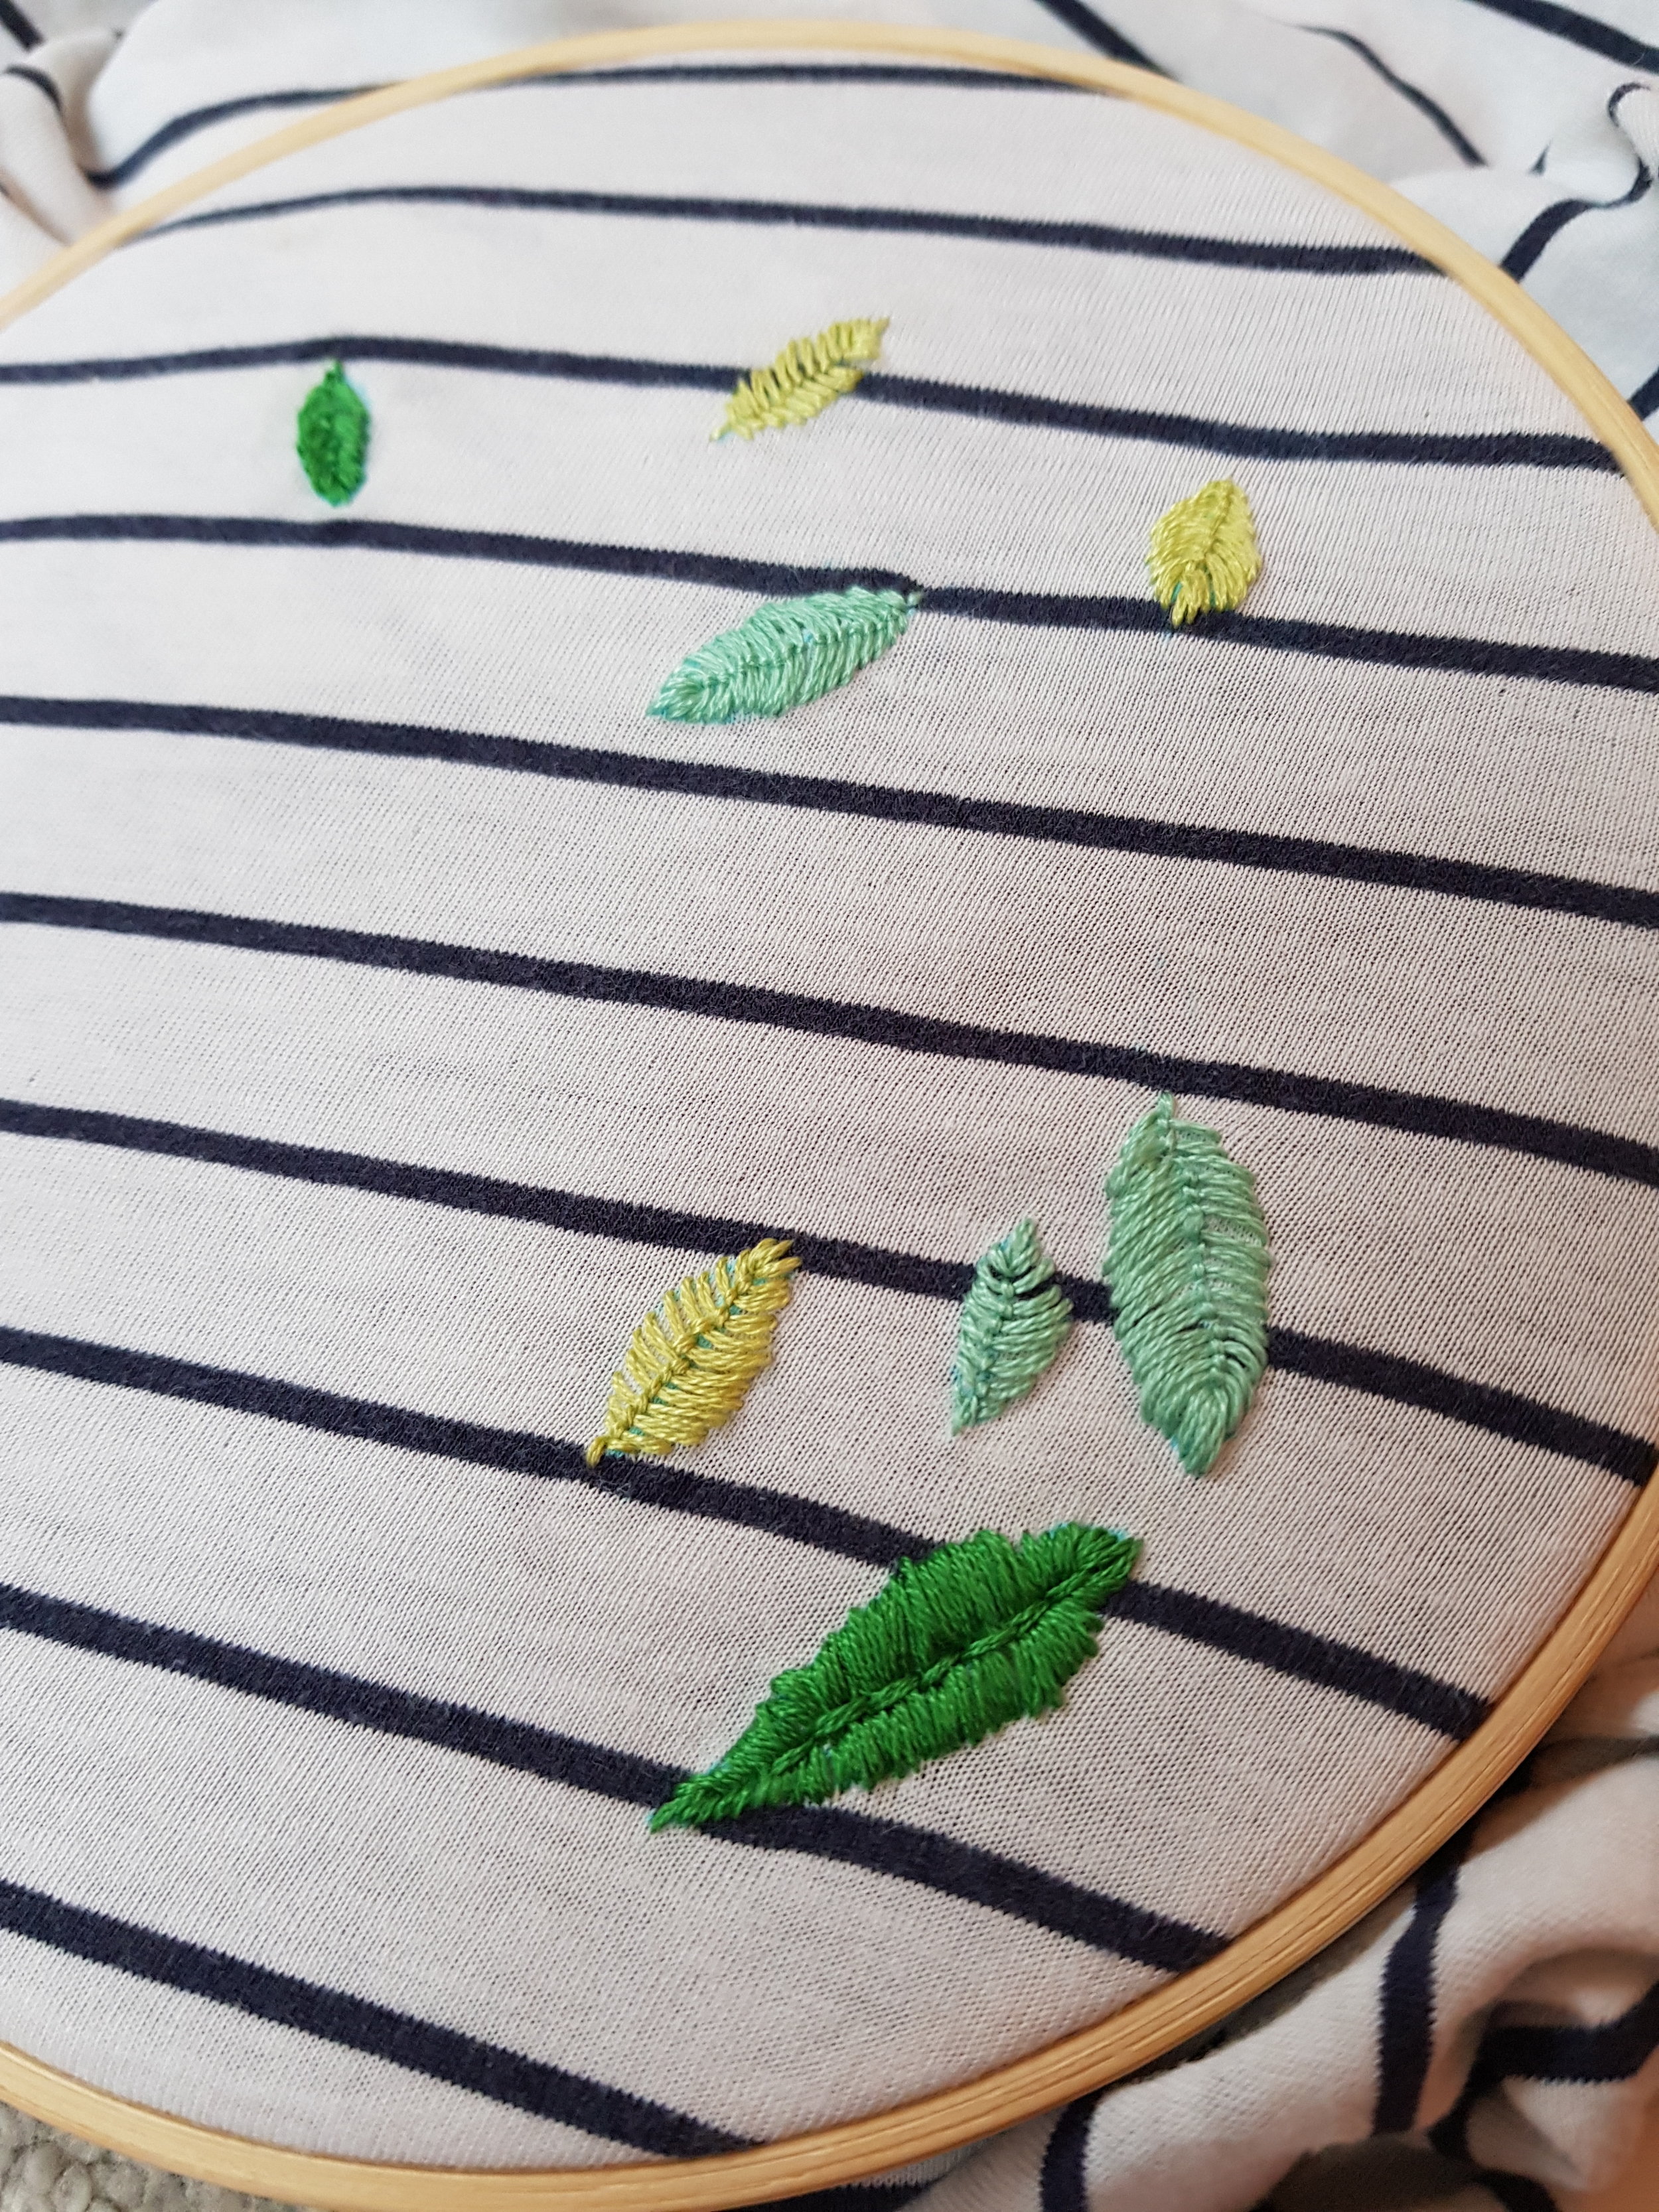
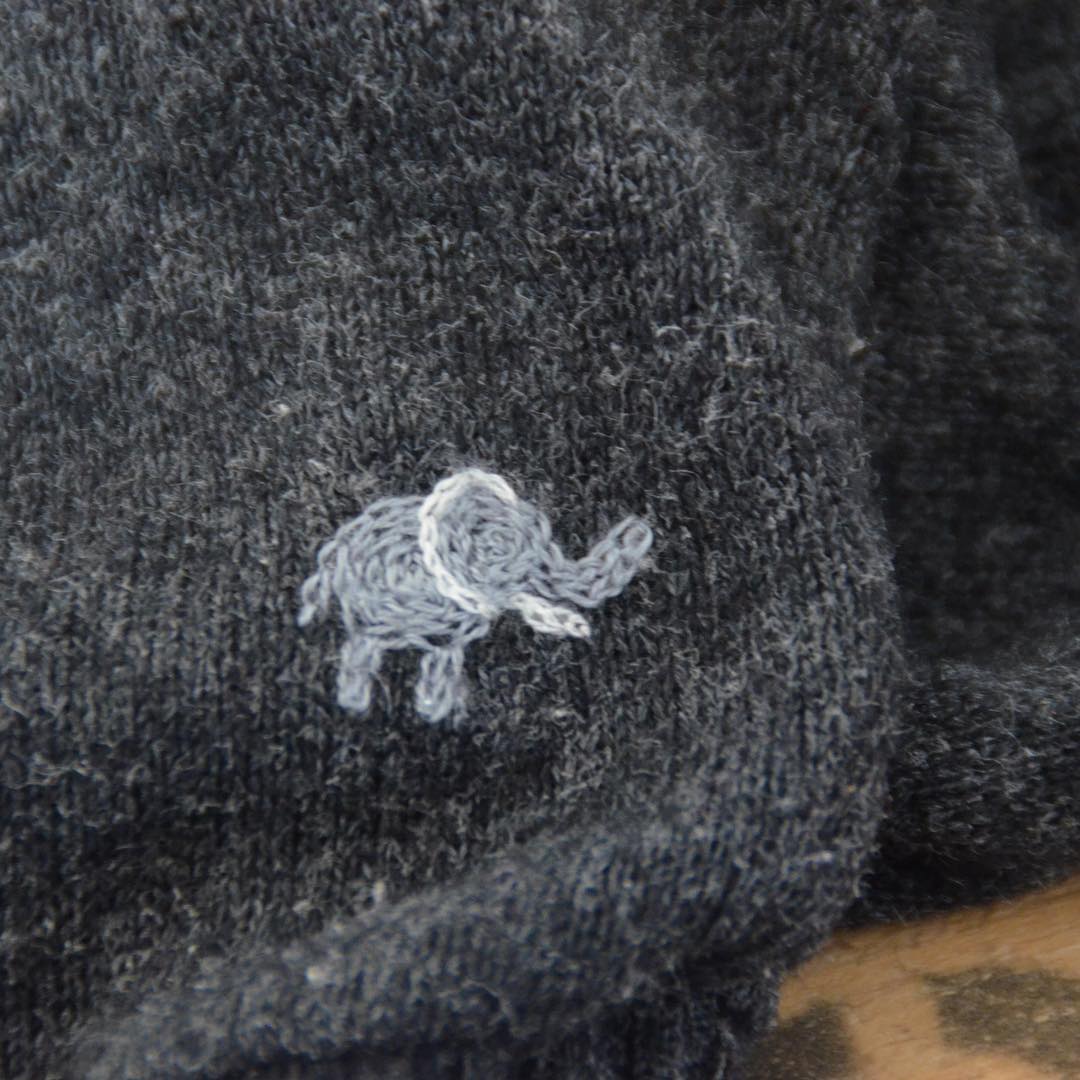
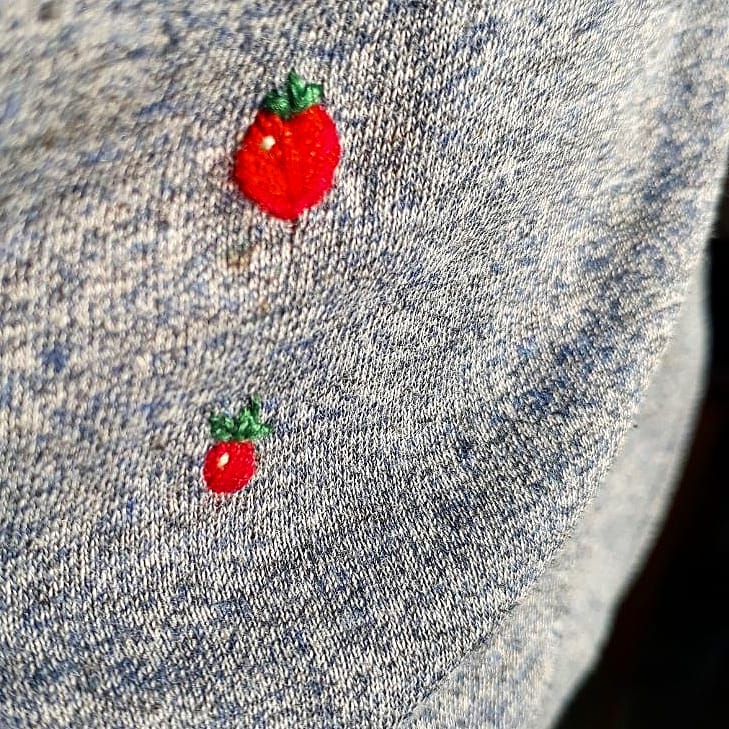
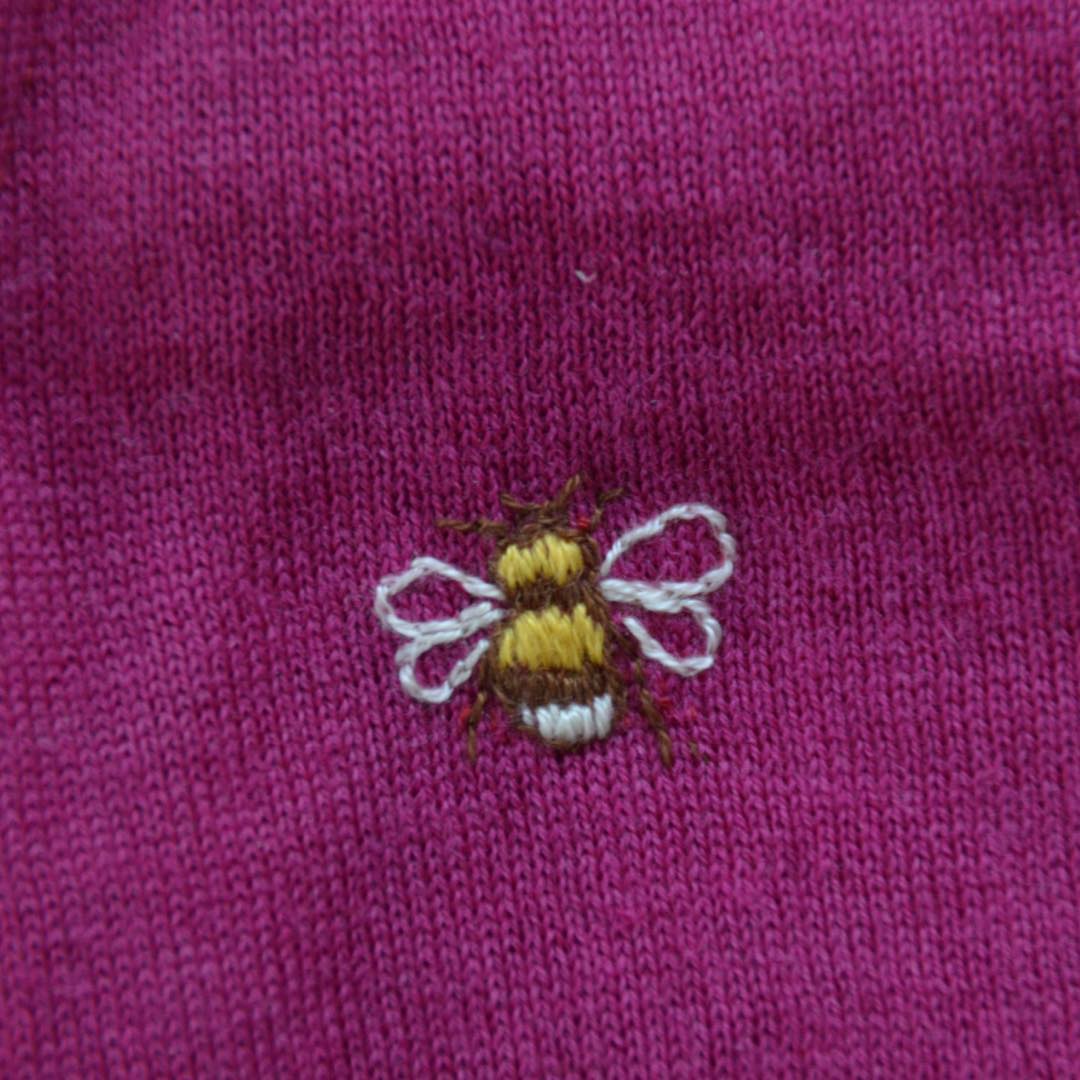
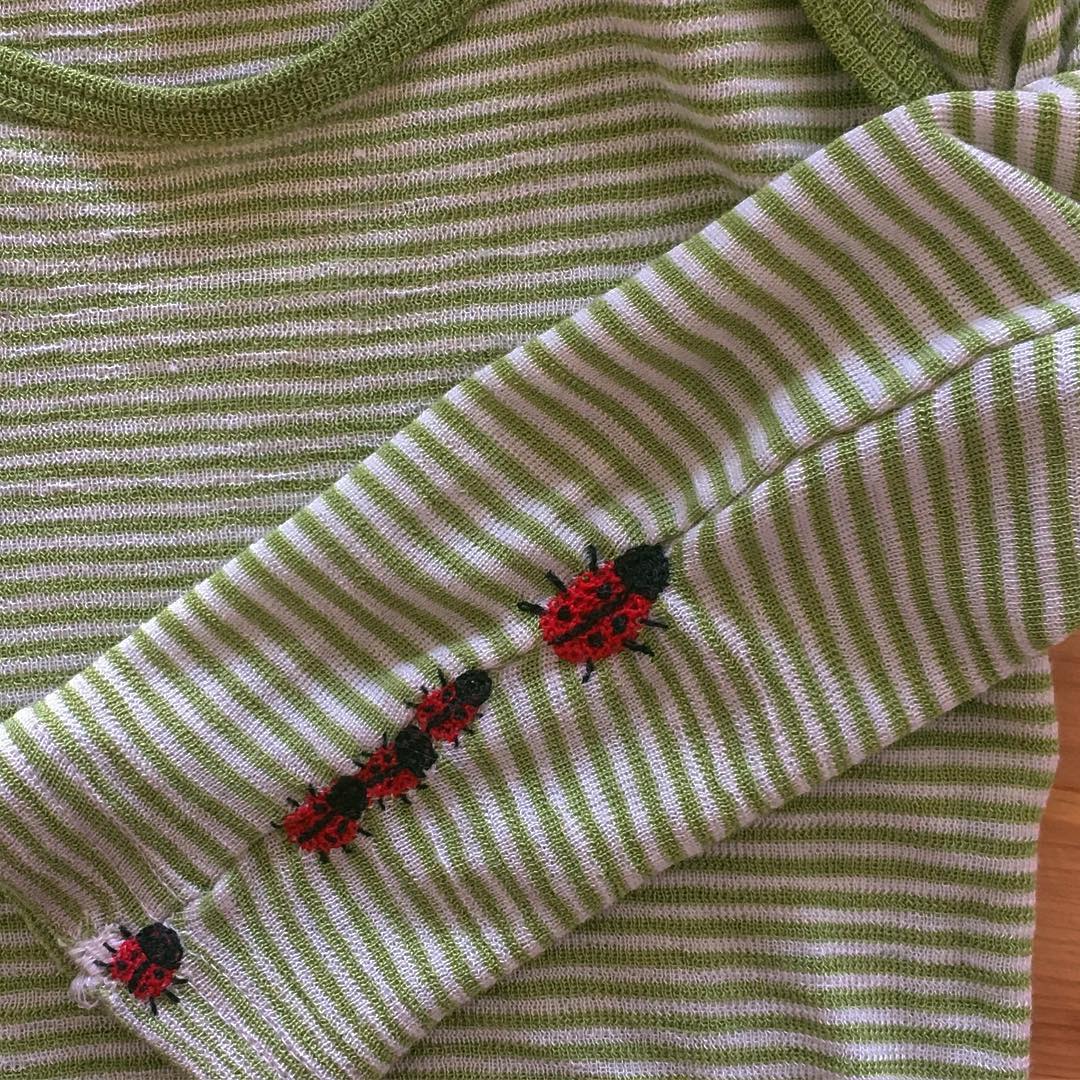
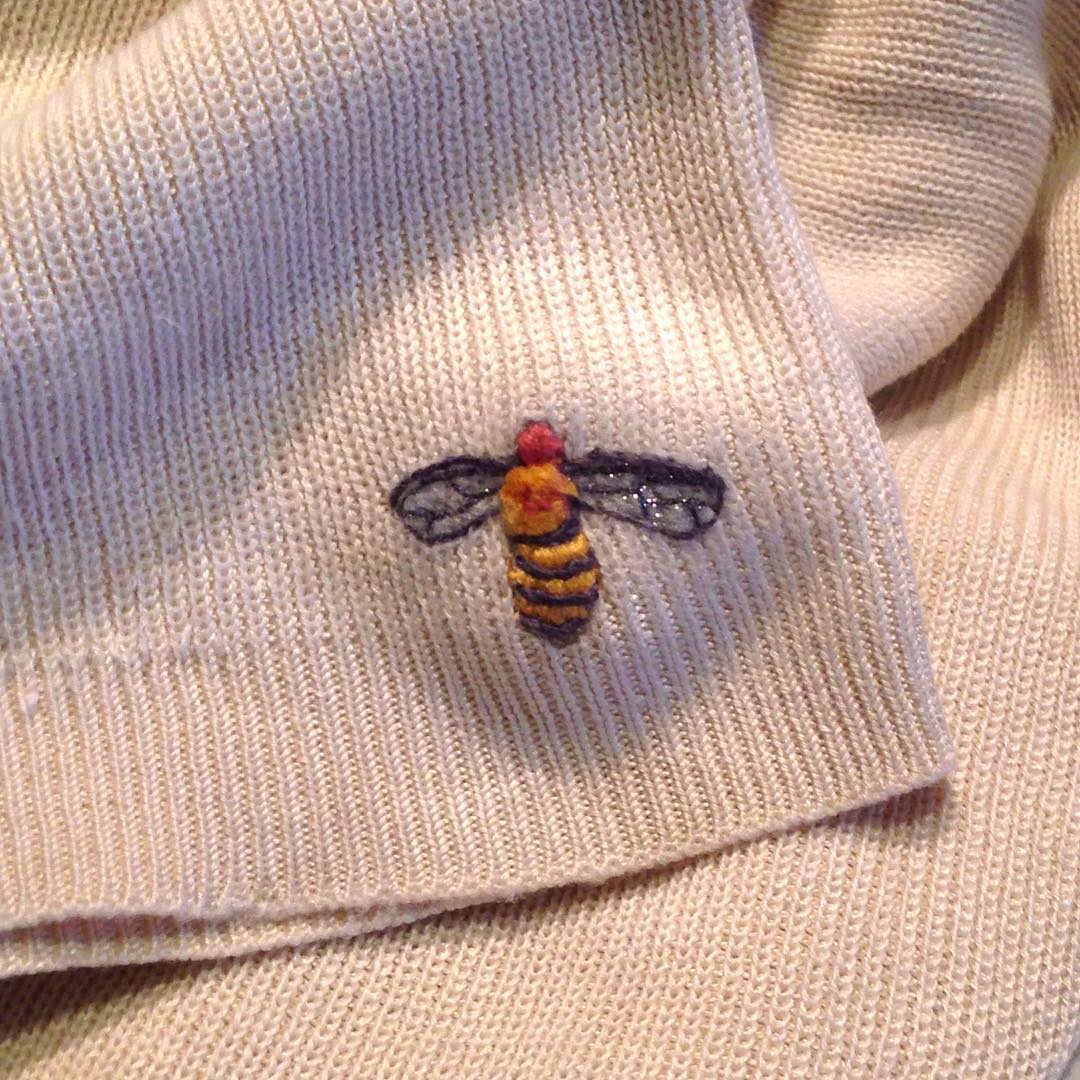
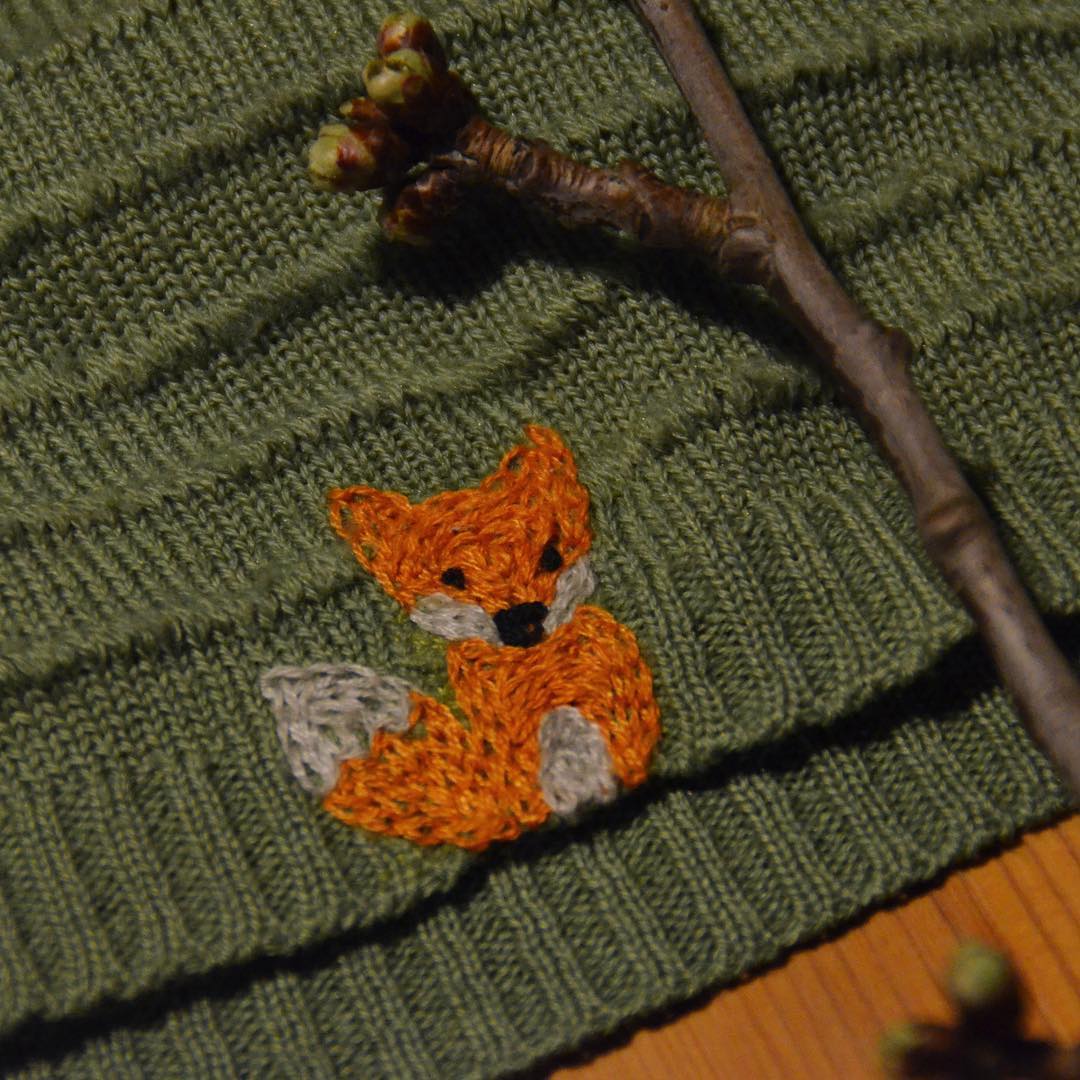
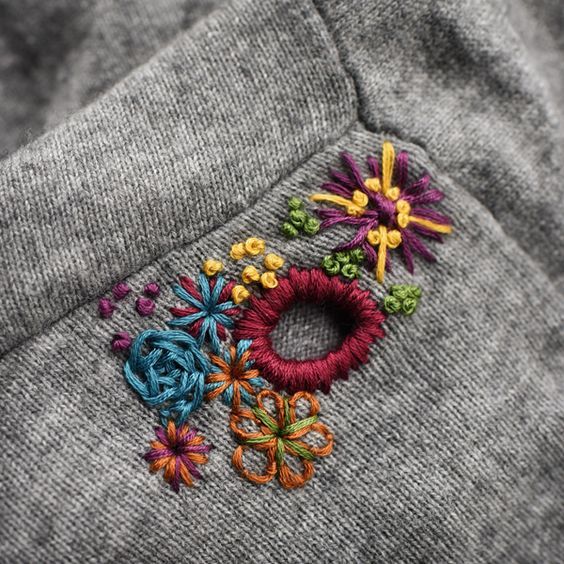
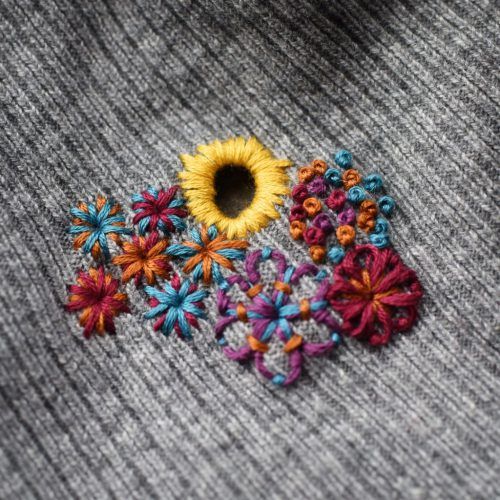
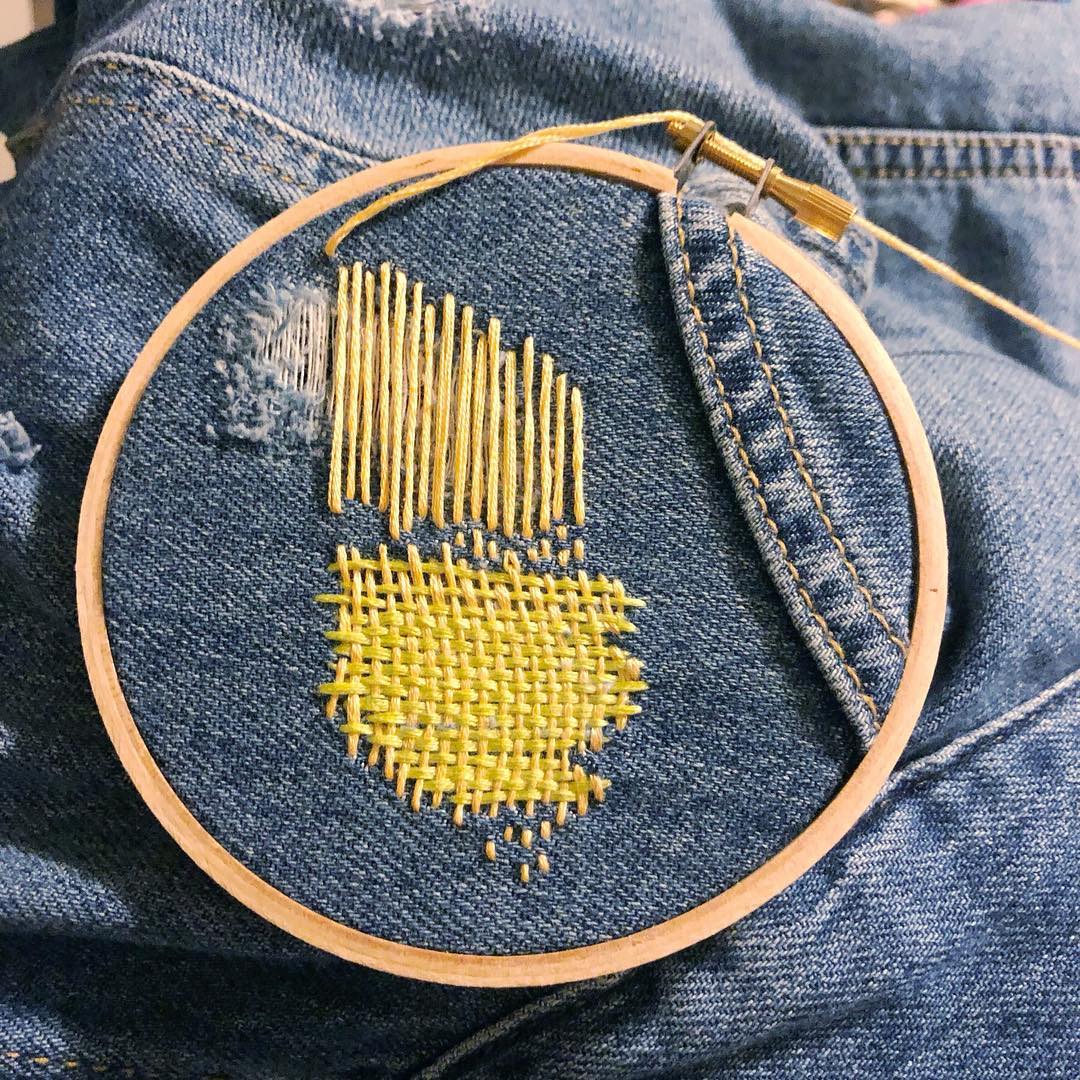
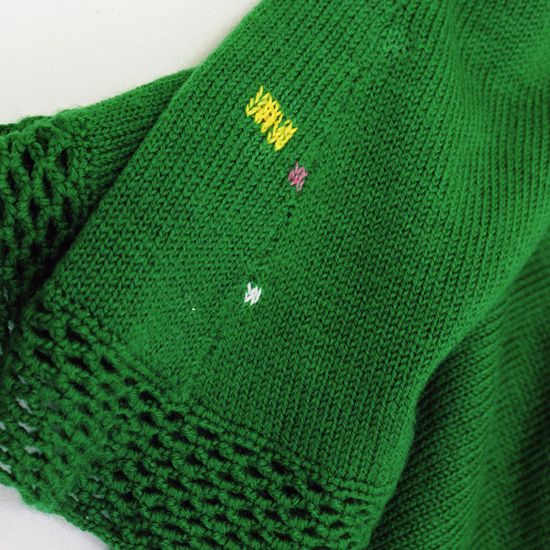
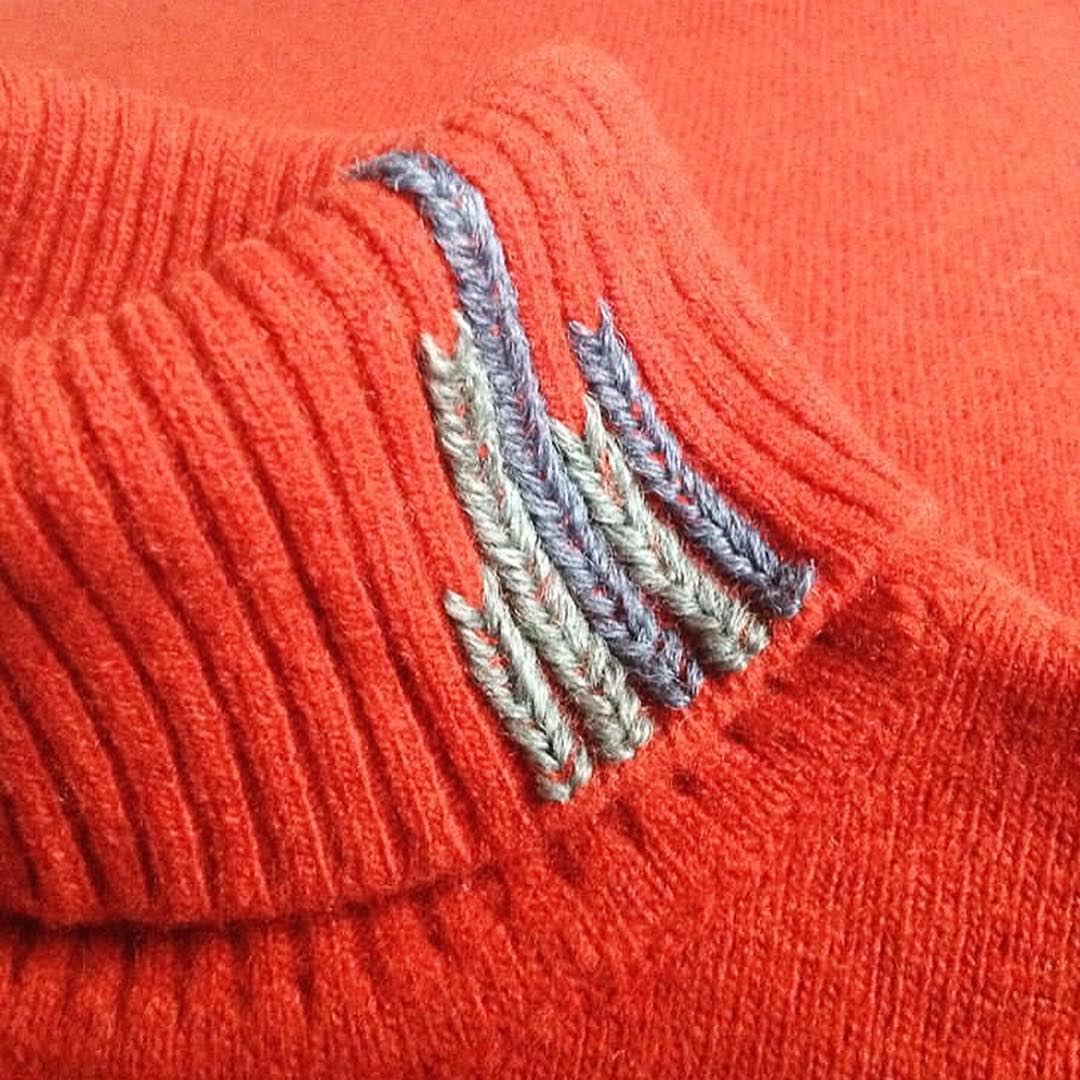
7. Embroidery
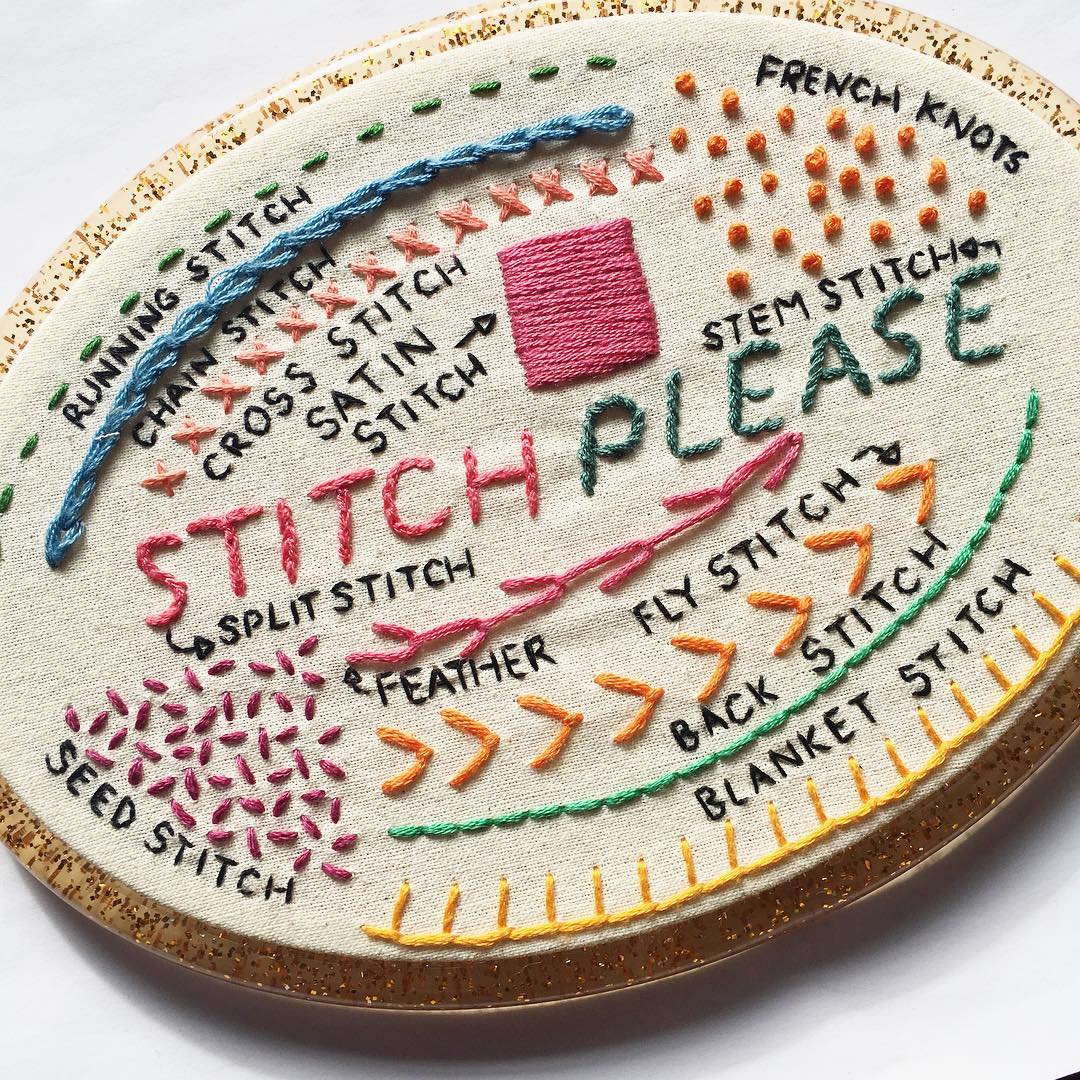
Most embroidery stitches are straight forward, the trick is to be quite neat and precise. YouTube is your friend for learning these techniques and for getting ideas, but recently I’ve been having fun covering small holes with little embroidered motifs, often leaves, flowers or insects! You will need an embroidery hoop to do anything, these wooden rings keep whatever fabric you are working on tight and make life much easier. I then draw with a washable fabric marker whatever little shape I’m going to stitch, chose some coloured embroidery floss (this is standard 6 strand embroidery thread) and use and use an embroidery needle (usually longer, thinner and with a wider head than most needles). Satin stitch it the most basic, it involves sewing in and out close together to fill in a shape. If the edges aren’t quite in-line you can always stitch around the outside in a back stitch, chain stitch or stem stitch to keep it neat. My embroidered leaves (in the image) were done either in satin stitch, fly stitch or fishbone stitch. This was my first attempt at this sort of mend and I hadn’t embroidered for around 30 years. It’s not perfect but it worked and it wasn’t too hard either!